Thursday, December 24, 2015

Surreal image

Make surreal art with masks.

     This project took a little longer than expected. Some of the instructions were not clear, or maybe my version of photoshop is different.
     When I first seen this tutorial it really didn't interest me, but I looked it over and thought what the hell why not. Once I started I couldn't stop. This kind of imagery almost forces you to be creative.
     When I downloaded the image file ( it took awhile ) so that was a warning to me that there was a lot of images. This piece has 18 different images blended into it.
Valley of the gnomes
Valley of the Gnomes
I couldn't resist putting myself into the picture.

Wednesday, December 23, 2015

Out of bounds

Play with out of bounds effects.

     This image was relatively simple, But still a great lesson plan. This image used 5 images, and the use of masks to blend them.


     The top two images were cut in half with a mask to create the background.

     This image used for the smoke around the wheels, and the image on the right is used out of the smoke stack. The train was used twice.
once in full color and again for the sepia or vintage look on the 
train cars.


     The fun part was creating the shine of the headlights. "pretty cool".


Tuesday, December 22, 2015

Fractal tiger

Photoshop Creative tutorial.

Following the tutorial from the Photoshop Creative magazine. This is the image I created.

Fractal Tiger

     This image was created using relatively straightforward techniques. The one tool that was used is the infamous "Pen tool". I have used this tool in Illustrator, and just love it, but never had a lot of use for it in photoshop until today. Some of the other tools used are the brush tool, and the smudge tool was used to create the effects of the hair strands. Most noticeable on the glowing edges and outline.   


Wednesday, October 21, 2015

Photoshop "Owl's Flight"

created this nice effect practicing with the the quick select tool, and refine edge feature.

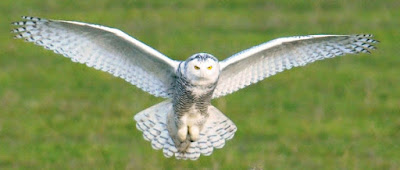
Original

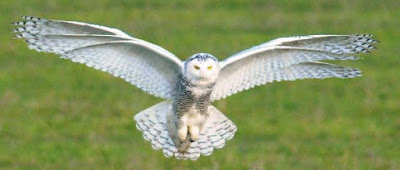
Flight through Photoshop
With the quick select tool I selected just the wings, then I went to the select tab and chose refine edge. refined the edge to what I thought looked pretty good. Then choose OK. with the image area still active type "ctrl + J" this puts the selection on its own layer.
     Make a copy of the layer. "ctrl + J".
Now play around with resizing and warping each layer until you like the way they fit.
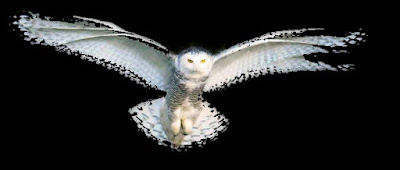
I wanted to give it a little more effect so I simply put it on a Black background.
The edges sort of disappear
I wasn't expecting that.....But I kinda like it...  

The Owl's flight continues.

I have no idea where this fascination with owls came from. But for now I'm just going with it.
This next image was created using bushes in Photoshop. I usually only used brushes to erase things,But now..........I can use them to create.


Photoshop "The season change"

sure can be rough on a guy. 

One day it's warm out and my sinuses go berzerk.Then the next day it gets cold out and I start getting my winter coat.........

Photoshop Things just happen

While playing around with images to create a duotone. 

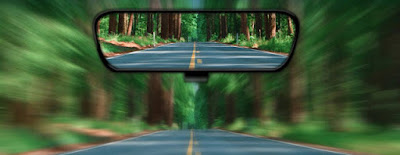
I had cutout the image of a Ford mustang. I wanted to use it somehow. But I couldn't think of anything...So I let it sit..And went to work on my superhero character..After posterizing my face, and creating the superhero. I came back to the Mustang image. Posterized it and played around with the image, by adding perspective. just generally doodling around. Then it hit me. That thing would look mean in my rearview mirror.


This is the final....I think this would be an awesome mancave poster........